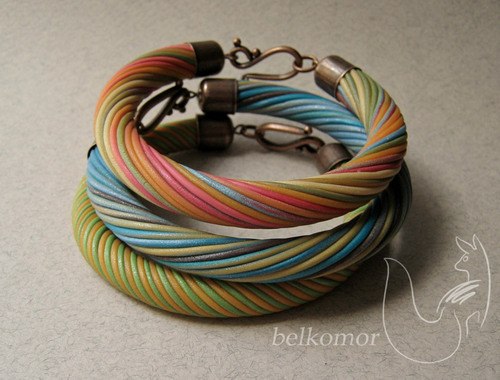
Polymer clay extruder twisted bracelet is just amazing and so simple to create! I could not resist to share this nice step by step tutorial with you. I hope you’ll enjoy it and if you try it please share the result! I’m just waiting to see what colors you’ve combined 🙂
Things you need:
– polymer clay in multiple colors
– extruder
– two end caps medium size
– pins or simply wire and tools to model it
– lock
Process:
Step 1: After choosing your colors prepare them to use into the extruder. This constain in creating a sheet of each color of clay. Cut with the round cutter some shapes of each colors and combine them as you wish. For the next step you will introduce the clay into the extruder and use the sieve with 12 holes. This sausages that resulted will form the exterior of the bracelet
Step 2: For the interior of the polymer clay extruder twisted bracelet we will repeat the process with the extruder, but this time using the sieve with one round hole.
Step 3: You have to carefully attach the thin sausages from step 1 to the base from step 3, preferably without gaps or creeping on each other. When you covered the base round it up using a bracelet mold. Cut the edges to have the size you need and make a hole with the pins in each one. You can now bake your polymer clay twisted bracelet.
Step 4: You can use a varnish for the shine effect. Add the two end caps in medium size and the lock.
Good lock! I hope you enjoyed this new technique to create bracelets. Here you will find the full article on this polymer clay twisted bracelet tutorial.
You should try this link where you will find more jewelry ideas that match any occasion you have in mind. If you are interested in learning more about how to create with polymer clay, here is nice list with tutorials.
Don’t forget to follow my Pinterest page to get captivating polymer clay new ideas and free step by step DIY tutorials .
######
